

Six years ago my son was two. He was sitting in his high chair with both fists jammed into cups of neon blue dye from a grocery store kit. And I watched him shove those dripping fingers straight into his mouth. That was the last time I bought one of those kits.
That same night I sat on the kitchen floor with my phone, googling “natural Easter egg dye” while my husband cleaned blue handprints off the wall. I grabbed the turmeric from the spice rack and a bag of onion skins I’d been meaning to throw away. Winged the whole thing. No recipe, just vibes and desperation. Those eggs came out better than anything I’d ever made with a kit. Warm and golden and a little uneven in the best possible way. My husband walked into the kitchen the next morning and said “where did you buy those?” I was hooked. Never went back.
Five Ingredients for Every Easter Egg Color You Actually Want
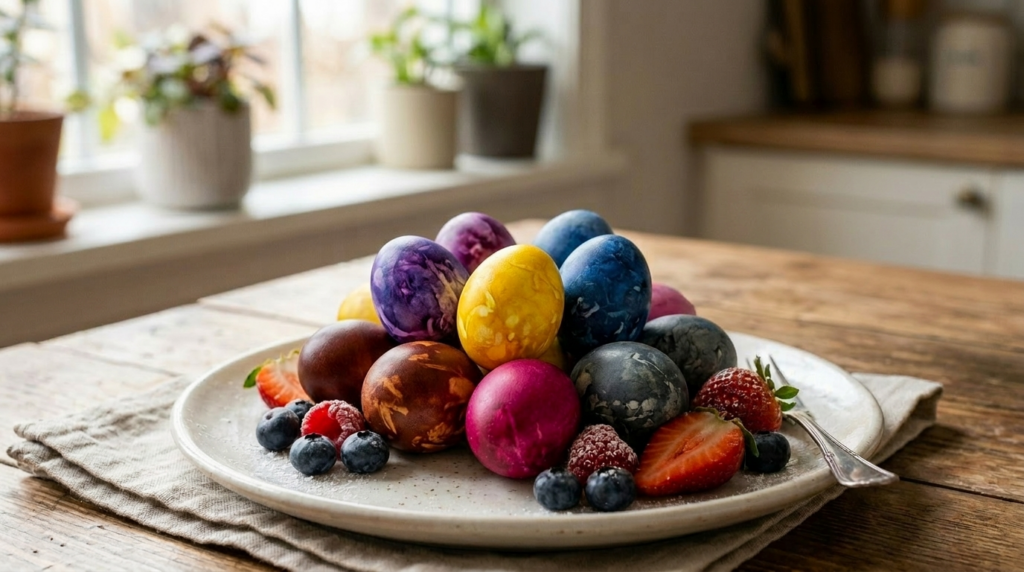
Onion skins, red cabbage, turmeric, beets, and hibiscus tea. That’s it. That’s the whole lineup. Between them you can get every color from deep mahogany to sky blue to this moody graphite thing that honestly looks like it belongs in a geology exhibit, not on a breakfast plate.
And the timing here makes more sense now than ever. The FDA banned Red No. 3 back in January 2025. A few months later, HHS and the FDA announced they want ALL petroleum-based synthetic dyes out of the food supply. School meals by 2026, everything else to follow. Natural dyeing isn’t some hippie sideshow anymore. It’s just… dyeing. Regular dyeing. The normal kind.
Anyway. Let’s wreck some eggs.
Onion Skin Easter Eggs: Gold to Terracotta (My Favorite by a Mile)

This one. Right here. My ride-or-die. If you try absolutely nothing else from this post, try onion skins. They are the most predictable, most forgiving, most consistently gorgeous method out of all five. The color goes from pale gold all the way to deep terracotta and even dark mahogany depending on how long you leave the eggs in. I have never, not once in six years, gotten a bad result from onion skins. Never. And I am not a person who gets consistently good results at anything.
I start collecting skins about three weeks before Easter. There’s a crinkly brown paper bag that lives on my counter from roughly mid-March onward, and every time I cook with onions (basically every night in my house) I peel off the dry outer layers and stuff them in the bag. That papery crunch when you shove a handful in. My son thinks I’m hoarding trash. “Mom, why are you keeping garbage?” Because, buddy, this garbage is going to make your Easter eggs look incredible. He’s eight now and still not fully convinced, but he does get excited when the eggs come out of the pot, so I’m calling it a win.
What You Need for About a Dozen Onion Skin Eggs
Skins from 10 to 12 large yellow onions (roughly 4 packed cups), 6 cups water, 1 tablespoon salt, 2 tablespoons white vinegar.

If you’re short on skins, ask the produce section at your grocery store. They always have loose skins at the bottom of the onion bin, and they’ll just hand them over. The guy at my Kroger knows me by now. Mid-March rolls around and he doesn’t even ask anymore. Just points at the bin.
Throw all the skins into a big pot. Stainless steel or enamel, not aluminum. Aluminum does something funky with the pigments and you end up with a dull, grayish result. I found that out the hard way with a camping pot I thought would be fine. It was not fine. Cover with your water. Bring it to a boil. Turn it down low. Put a lid on. Walk away for 30 or 40 minutes. Go fold laundry. Scroll your phone. Whatever.
When you come back, the water will look like the strongest coffee you’ve ever seen. Almost opaque.
Here’s the thing that changed everything for me: don’t use it yet. Kill the heat and just leave that pot sitting on the stove overnight. I know, I know. You want to dye eggs RIGHT NOW. But that overnight steep turns the liquid from “strong” to “nuclear.” The color difference the next morning is wild. Deep amber versus light tea. Not even close.
Next morning. Strain out the skins through a sieve, press them against the mesh to squeeze out every last bit of color. Add your salt and vinegar. The salt helps prevent cracking. The vinegar is your mordant, which is just a fancy word for “the thing that makes color actually stick to the shell instead of washing right off.”
This next part I learned the hard way, that very first Easter, three cracked eggs floating sadly in brown water: take your eggs out of the fridge AT LEAST an hour before you start. Two hours is better. Cold egg plus hot liquid equals cracked egg. Every single time. Physics doesn’t care about your schedule. A cracked egg means dye seeping into the white and also a shorter shelf life. So. Room temp. Please. I’m begging you.
Oh, and wipe each egg with a vinegar-soaked cotton pad first. Eggshells have this invisible oily coating on them, and if you skip this step the dye beads up in weird patches instead of going on smooth. I skipped it my second year thinking it was unnecessary fussiness. It is not unnecessary fussiness. It is extremely necessary fussiness.
Lower your eggs gently into the strained dye bath. Everything submerged. Bring to a soft boil, drop to a simmer, 12 to 15 minutes. Then turn off the burner and… leave them. Half an hour gives you a nice honey-gold tone. A few hours and you’re in burnt orange territory, almost terracotta. Overnight in the fridge? Mahogany. Deep and dark and the kind of color that makes you say “I made that?” out loud to nobody.
When they’re totally dry, grab a cotton pad, put the tiniest (I mean TINY) drop of vegetable oil on it, and buff each egg. They’ll shine like they’ve been lacquered. This one stupid little step is what makes people say “you MADE those?” Just don’t go overboard with the oil, because the eggs turn into greased little missiles that shoot right out of your kid’s hands like soaped-up piglets and all your beautiful work ends up on the floor. Last Easter my son launched a perfect mahogany egg straight off the table and into the baseboard. He looked at me. I looked at him. We both looked at the egg. Nobody said anything for about five seconds. RIP, little egg. You were gorgeous.
Red onion skins give you a whole different palette, by the way. More plum, more wine-colored. You can mix red and yellow skins together and get this complicated burgundy-amber thing that’s hard to describe. I’ve never gotten the same shade twice. Which is either frustrating or charming, depending on your personality.
How to Dye Easter Eggs with Red Cabbage (Sky Blue, No Joke)
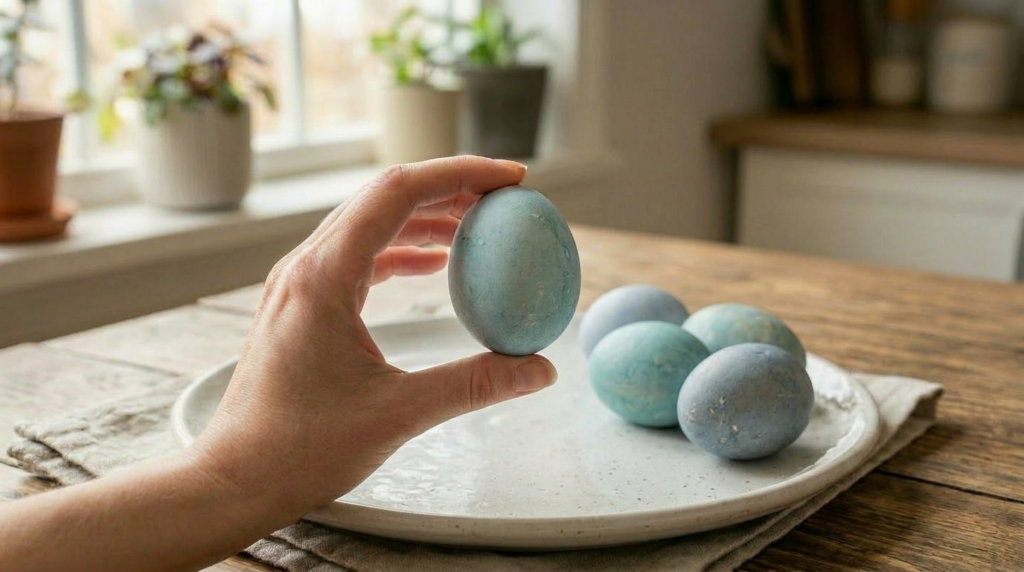
This one blows people’s minds every single time. You take a red cabbage, a purple-looking vegetable, and somehow it turns your eggs blue. Not purple. Blue. Like robin’s-egg blue. Like the sky on a clear March morning when you should be cleaning the house but you’re outside staring at clouds instead.
Makes no sense until you understand the chemistry. And honestly even then it still feels like a magic trick.
Here’s what’s actually happening. Red cabbage contains anthocyanins, the same pigments you find in blueberries and red wine. In their natural state, dissolved in slightly acidic cabbage water, they look purple. But eggshells are alkaline. When the purple dye meets the calcium carbonate in the shell, the pH shifts and the color swings to blue. Basically a science fair project that just happens to produce the prettiest eggs you’ve ever seen. My son was obsessed with this part when I explained it to him. He kept adding pinches of baking soda to leftover dye and watching the color shift and yelling “MOM IT’S CHANGING AGAIN” like he’d discovered alchemy. Which, I mean. He kind of did.
What You Need for Red Cabbage Easter Eggs
Half a large red cabbage chopped roughly (about 4 to 5 cups), 4 cups water, 2 tablespoons white vinegar, 1 tablespoon salt.
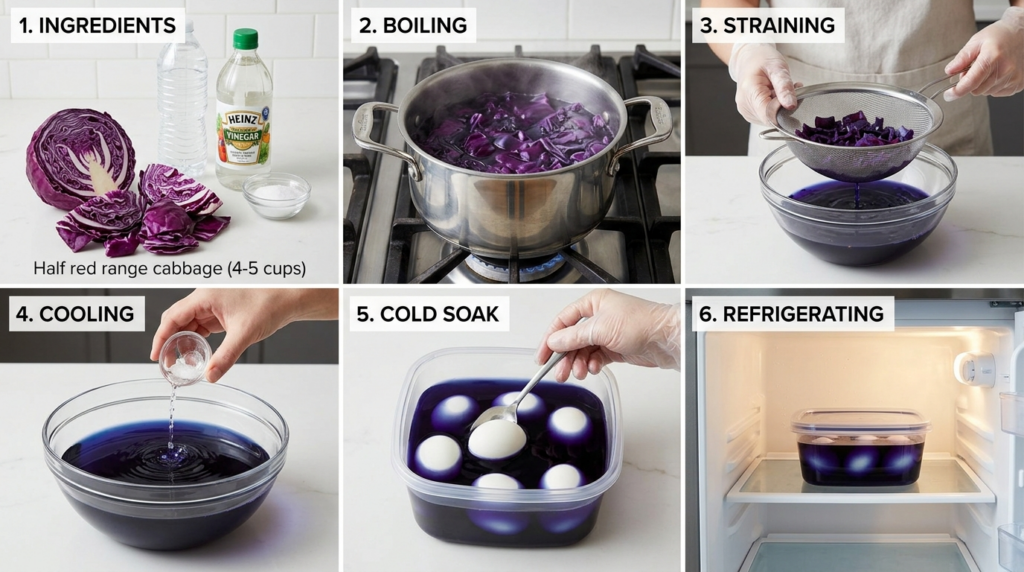
Chop the cabbage. Doesn’t have to be pretty because you’re going to strain it all out anyway. Throw it in a pot with the water. Bring to a boil, then simmer for about 20 to 30 minutes. The water will turn a deep, inky purple that stains your pot and makes your kitchen smell like… well, like boiled cabbage. Not the most glamorous scent in the world. My husband usually finds somewhere else to be during this part. Can’t say I blame him.
Strain out the cabbage pieces. Stir in the vinegar and salt. Let the dye cool down to room temperature. This matters because if you drop your eggs into hot cabbage dye they can crack and the color grabs all uneven and splotchy.
Now submerge your hard-boiled eggs. And here’s the key thing about red cabbage that’s different from every other dye on this list: it does NOT work well as a hot-boil method. Don’t cook your eggs in the cabbage water. Boil the eggs separately, make the dye separately, cool the dye, THEN soak the cooked eggs in the cold dye bath. I tried boiling eggs directly in cabbage water my first time and they came out a muddy, streaky gray-purple that looked frankly depressing. Completely different result from the cold soak. Night and day.
Into the fridge with the whole container. Two hours gives you a soft, pale blue, almost periwinkle. Four to six hours and you hit that perfect robin’s-egg blue. Overnight gets you into deeper territory, a rich teal that almost looks painted on.
If you want to go absolutely wild? Once you’ve got those blue cabbage eggs, flick a few drops of gold paint or turmeric dye onto them with an old toothbrush. Gold splatter on a sky-blue shell. It looks like something from a fancy design magazine. My neighbor brought a batch like that to brunch last year and people literally gasped. Gasped! Over eggs! I have never in my life felt competitive about eggs before, but I’ll admit that stung a little.
Oh, and I almost forgot. If you add baking soda to the cabbage dye instead of vinegar, the liquid shifts from purple to a vivid greenish-blue. You can mess around with the pH to get different shades. More vinegar pushes toward purple, baking soda pushes toward teal. It’s genuinely fun to experiment with, especially if you have kids who like things that feel like a science project.
Turmeric Easter Eggs: Bright Yellow the Easy Way
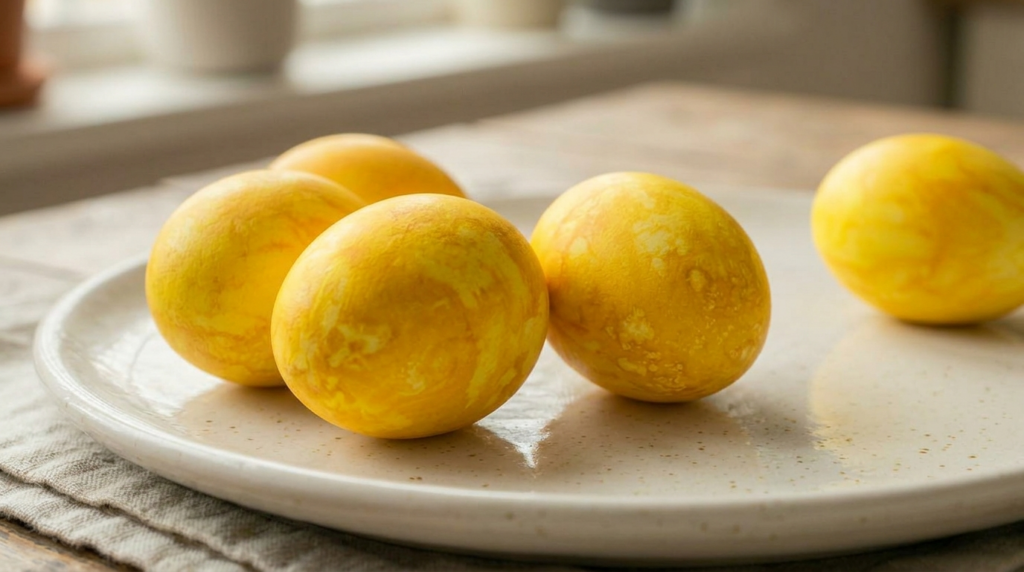
Turmeric is the reliable friend. The golden retriever of natural dyes, if you will. You will get bright, sunny, happy yellow eggs and you will get them without drama. No tantrums. No weird surprises. Just yellow. Good, honest yellow.
What You Need for Turmeric Dyed Eggs
3 to 4 tablespoons ground turmeric, 5 cups water, 1 tablespoon salt, 2 tablespoons white vinegar.
Whisk the turmeric into the water. Really whisk it, because turmeric powder clumps like wet sand if you just dump it in. Put your room-temp eggs in. Bring to a boil, reduce heat, cook 10 to 12 minutes. Take it off the burner. Let them sit.
The thing about turmeric is it works FAST compared to everything else on this list. Where cabbage and hibiscus need hours to develop color, turmeric starts grabbing the shell almost immediately. Thirty minutes gives you solid yellow. An hour or two and you’re deep gold, almost marigold. There’s something really satisfying about that speed. Like it just wants to do its job and get it done.
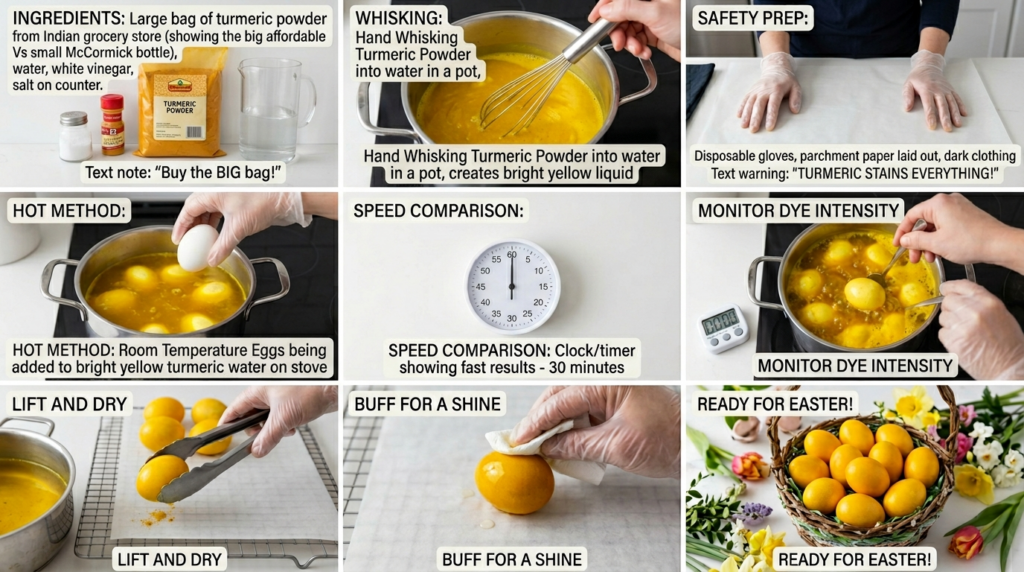
Two tablespoons of turmeric gives you basically nothing, by the way. A vaguely yellowish egg that looks like it might be coming down with something. I made that mistake the first time, trying to stretch a small jar across two dozen eggs, and the color was so faint my sister asked if I’d “forgotten to finish them.” Thanks, Jen. I buy the big bag now from the Indian grocery store, the one that comes the size of my fist for about three bucks. Those little McCormick bottles from the regular store are fine but they run out in about two seconds and cost a small fortune per ounce. A big bag from an Indian or Middle Eastern market lasts me multiple Easters and I still use it for cooking in between.
Three tablespoons: solid gold. Four tablespoons: DEEP gold, almost marigold-colored, the kind that practically glows on the table. Don’t be stingy with the turmeric. Go big.
You can also do a cold soak for the most even result. Boil your eggs separately, make the turmeric bath, let it cool, submerge the eggs and stick it all in the fridge overnight. The color comes out insanely uniform. Like the egg swallowed the sunset whole.
I do have to warn you though. Turmeric stains EVERYTHING.
Your hands. Your nails. Your countertop. Your sink. Your favorite wooden spoon. That kitchen towel you grabbed without thinking. The grout between your tiles if you spill even a little. I once got a splash on a white t-shirt and tried every stain remover in the house over the next week. Bleach. OxiClean. Hydrogen peroxide. Some Pinterest thing with dish soap and baking soda that did absolutely nothing. That shirt is a crop top now because I cut off the yellow part and gave up. Looked kind of cute, actually. Silver lining.
Wear gloves. Put down parchment paper or newspaper. Wear dark clothes. Baking soda and lemon juice will get it off your skin if you forget the gloves, but off fabric? It lives there forever. Like a little yellow ghost of your Easter ambitions.
The smell is something too. Hot turmeric has this almost medicinal, earthy, slightly bitter scent that fills the entire house. Not bad exactly, but strong. My son says it smells like “a doctor’s office but for food.” Kid’s got a point. But I love it now, honestly. My brain just connects the two. Turmeric smell means Easter’s coming. Weird Pavlov thing I’ve got going on.
White eggs come out canary yellow. Vivid, almost aggressive. Brown eggs go more ochre, more muted gold. Both look great, but white gives you the real WOW factor.
Beet Dyed Easter Eggs: Beautiful, Maddening, Worth It (Mostly)
Okay. I need to be honest with you about beets.
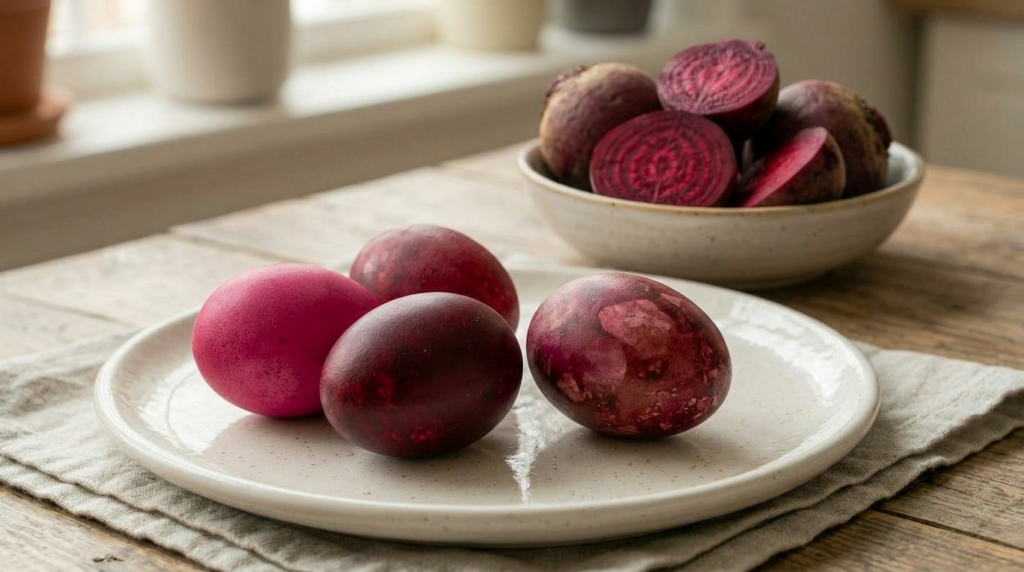
Beets are the ingredient everyone gets excited about because the idea is just so romantic. Gorgeous, rich, vibrant pink and rosy-burgundy eggs, the color of a Valentine’s Day card, perfect for Instagram, perfect for the table. And when it works, it IS beautiful. A perfectly beet-dyed egg is this soft, dusky rose color that photographs like an absolute dream.
The problem is beets are temperamental. The most frustrating dye on this list by a wide margin. I’ve had batches that came out a stunning blush pink and batches that came out a sad, murky brown that looked like I’d rolled the eggs around in the backyard. Same beets. Same method. Different result. I came very close to giving up on beets entirely after one particularly bad Easter where every single egg looked like it had been dug up from an archaeological site. My husband tried to be supportive. “They look… rustic?” No, Dave. They look terrible.
But I kept at it, because I’m stubborn, and I’ve figured out the tricks. So let me save you the grief I went through.
What You Need for Beet Dyed Easter Eggs
2 large beets peeled and roughly grated or chopped, 4 cups water, 2 tablespoons white vinegar, 1 tablespoon salt.
The CRITICAL rule with beets: do NOT boil your eggs in the beet water. This is where the brown happens. Heat oxidizes the beet pigments and they go from gorgeous magenta to ugly brownish-red. Every single “beet eggs turned brown” horror story I’ve ever read online involves someone boiling eggs directly in the beet dye. Don’t do it. Just don’t.
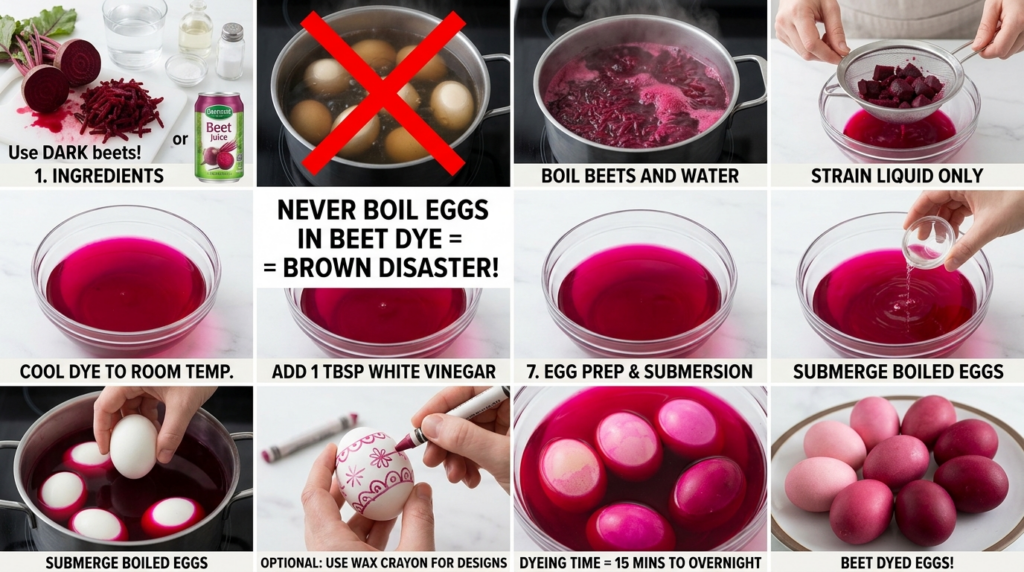
Instead, make the dye separately. Put the grated beets in a pot with the water, bring to a boil, simmer for 20 to 30 minutes until the liquid is a deep, screaming fuchsia. Strain out the beet chunks. Add vinegar and salt. And then let it cool completely. COMPLETELY. Room temperature or colder. I cannot stress this enough.
Now put your already-hard-boiled eggs into the cooled dye and straight into the refrigerator. Cold soak. This is non-negotiable with beets. Cold soak keeps the pigments stable and pink instead of letting them oxidize to brown.
One hour gives you a gentle blush. Barely there, almost like the egg is embarrassed about something. Three to four hours and you’re in solid pink territory. Overnight and the color deepens to a rich, dusty rose, almost burgundy. The color builds slowly and evenly in the cold, without the muddiness that heat creates.
Even with the cold soak, there’s some unpredictability because that’s just how beets are. The variety matters. Those deep, dark beets that bleed all over your cutting board the second you touch them are what you want. The pale, golden beets obviously won’t work for this. Canned beet juice is actually not bad in a pinch either. Some people swear by it, and it saves you the whole step of cooking down fresh beets. I’ve used it when I was running behind schedule and honestly the results were respectable.
And one more thing. Don’t rinse the eggs after you pull them out of the beet dye. Just set them on a paper towel and let them air dry. Rinsing washes off about half the color and you will be heartbroken. I made that mistake exactly once. Once was enough.
Beets are worth the effort when they cooperate. That pink is a color you genuinely can’t get any other way. Just manage your expectations and maybe don’t do beets for the first time on the morning of Easter Sunday. Do a practice run the week before. Future you will thank present you. Trust me on this.
Hibiscus Tea Easter Eggs: The Moody, Gorgeous Wildcard
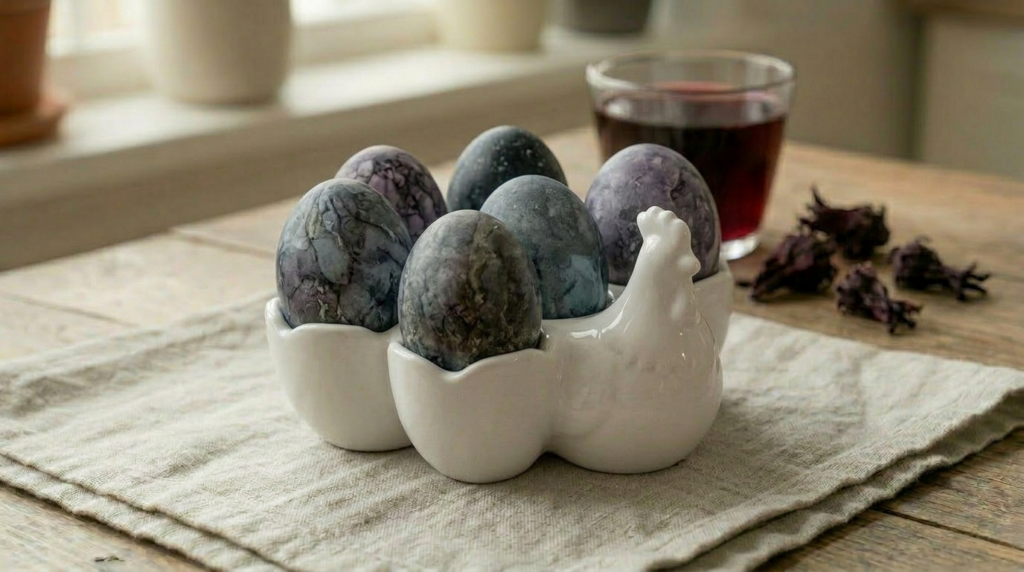
This is the weird one. The one that doesn’t really look like food when it’s done. Hibiscus-dyed eggs come out in shades of gray, graphite, smoky lavender, and this impossible charcoal-violet that genuinely looks like polished stone. I call them “space eggs” because that’s what they remind me of. Something you’d find on the surface of a strange, beautiful moon. My son calls them “alien eggs” and honestly that works too.
The texture is part of it. Hibiscus dye doesn’t lay down smooth and even like turmeric or cabbage. It builds up in layers, slightly uneven, with subtle tonal variations across the surface of each egg. The effect is almost geological. They look like they’ve been tumbled in a riverbed for a thousand years. When you rub them with a tiny bit of vegetable oil after they dry, they develop this deep, glassy sheen that honestly looks like semi-precious gemstones. Wine-dark and glimmering. Ridiculous, for an egg.
What You Need for Hibiscus Tea Egg Dye
About 2.5 to 3 ounces of dried hibiscus flowers (roughly 70 to 80 grams, one bag of “flor de jamaica” from a Latin market), 4 cups water, 1 tablespoon salt, 2 tablespoons white vinegar.

This part is really important: get the loose dried flowers from a Mexican grocery store, NOT hibiscus teabags from the regular tea aisle. The potency difference is massive. Teabags give you a faint, wishy-washy pink that’s honestly kind of sad. The real dried flowers give you that deep, dramatic color that makes people pick up the egg and stare at it.
Flowers in the pot. Water, salt, vinegar. Eggs in among the flowers. Bring to a boil, drop to simmer, 10 minutes. Off the heat. Now you wait.
Hibiscus takes its sweet time and there is no rushing it. Thirty minutes gives you barely a whisper of pink. Two to three hours and you start to see actual lavender-gray building up. But the real magic is overnight. Twelve to fourteen hours in the fridge and you get that deep graphite-charcoal color with the violet undertones, the one that makes people pick up the egg and turn it slowly in their hands like they’re inspecting a moon rock they found on a hike.
Turn the eggs gently with a spoon every 20 minutes or so during the first couple hours. Hibiscus dye settles weird and you’ll get dark splotches on the bottom and pale spots on top if you just leave them sitting. Just a gentle nudge. Not scrubbing. Think of it like rotating a rotisserie chicken but much, much slower and sadder.
The oiled-up hibiscus eggs are the real showstoppers of this whole project. Once they’re dry, that tiny drop of vegetable oil on a cotton pad transforms them completely. They go from matte and chalky-looking to this deep, lustrous, almost wet-looking sheen. Like stones polished in a wine barrel. My neighbor photographed a batch last year for her Instagram and people in the comments kept asking what brand of dye she used. She typed back “it’s tea” and nobody believed her. I felt oddly proud about that.
White eggs only for hibiscus. I tried brown eggs once and they came out looking like something you’d kick out of the way in a parking lot. Not cute.
How to Store Natural Dyed Easter Eggs Safely
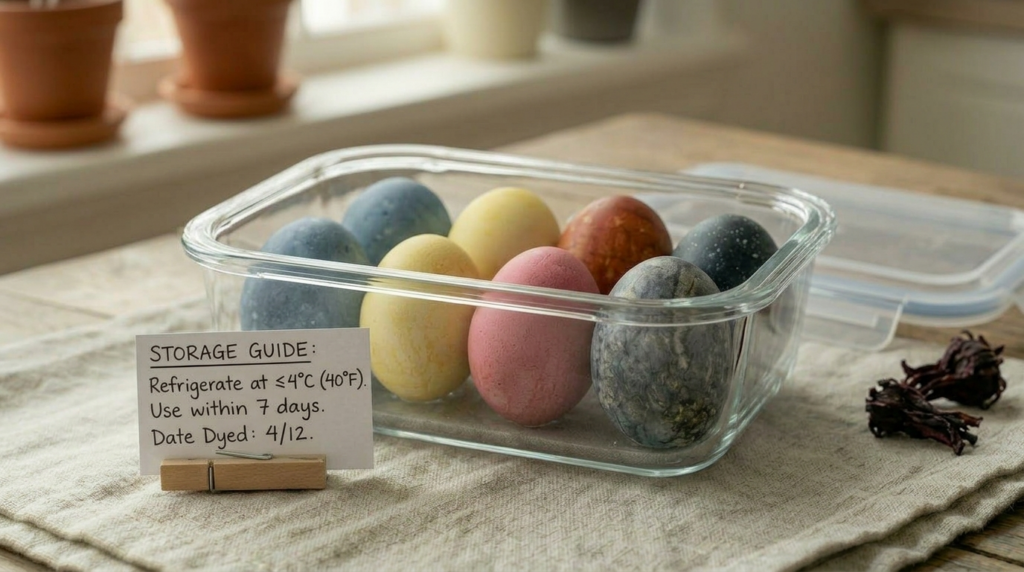
This is the boring part. I know. But it’s the boring part that keeps you out of the emergency room, so bear with me.
The FDA says hard-boiled eggs in the shell last up to one week in the refrigerator at 40 degrees Fahrenheit or below. The USDA says do not leave them at room temperature for more than two hours. After two hours in what they call the “danger zone” (40 to 140 degrees), bacteria are having the time of their lives and no amount of gorgeous color is going to undo food poisoning.
So. Dye your eggs, let them cool, get them into the fridge within two hours. If you’re doing an overnight soak (and you should be for most of these methods) the pot or container goes in the refrigerator, not on the counter. I don’t care if your fridge is packed. Make room. Move the leftover lasagna. Shove the pickles to the back. Find a way.
Displaying them in a basket for Easter brunch? Fine, but watch the clock. Two hours out, then back they go. Cracked eggs get eaten first, within a day or two.
I try to finish all my dyed eggs within about five days. Technically they’re safe for seven, but around day six that yolk starts getting chalky and gray and the sulfur smell creeps in and it’s just not great. Make egg salad. Make deviled eggs. Slice them on toast. Who on earth counts calories on Easter Sunday anyway? Nobody, that’s who. One egg is about 78 calories and natural dye doesn’t change that one bit. Now slather it in mayo, sprinkle some paprika on top, and enjoy your life.
Store them in a sealed container in the fridge. Not loose on a shelf. Not in a decorative bowl next to the leftover salmon. Eggshells are porous. They absorb smells like a sponge. A beautiful golden turmeric egg that tastes like fish is a tragedy I wouldn’t wish on anyone. Learned THAT one the hard way too. Are you sensing a pattern here?
Natural Easter Egg Dye Cheat Sheet (Save This)
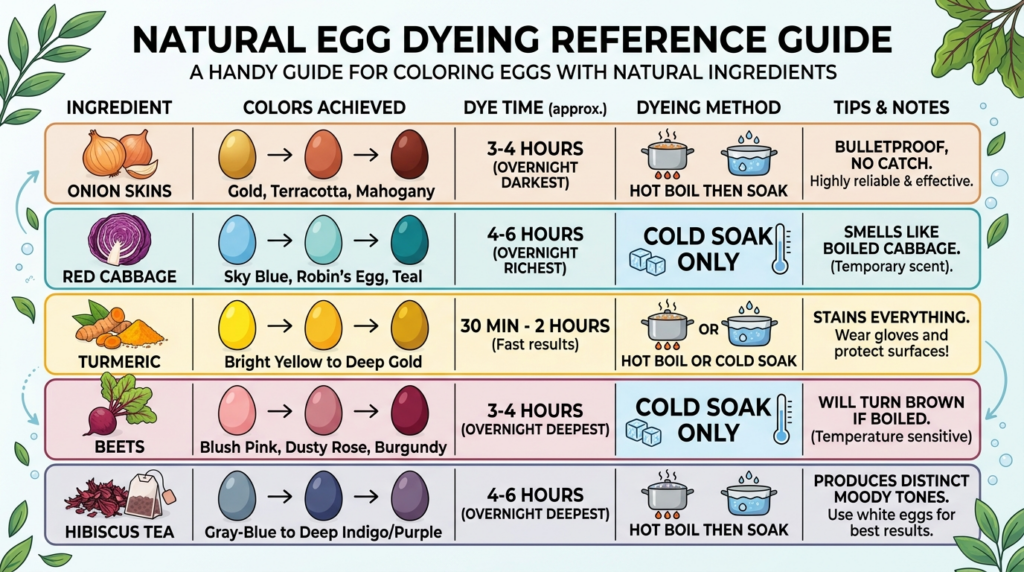
I know that was a lot of words. So here’s the quick version. Screenshot it, tape it to your fridge, text it to yourself, whatever. Future you at 10 PM the night before Easter, standing in the kitchen in pajamas wondering what goes with what, will be grateful.
| Ingredient | Color you’ll get | Soak time for deep color | Method | The catch |
|---|---|---|---|---|
| Onion skins | Gold to terracotta to mahogany | 3 to 4 hrs (overnight = darkest) | Hot boil, then soak | None. Bulletproof. My favorite. |
| Red cabbage | Sky blue to robin’s egg to teal | 4 to 6 hrs (overnight = richest) | Cold soak ONLY | Smells like boiled cabbage. Sorry. |
| Turmeric | Bright yellow to deep gold | 30 min to 2 hrs | Hot boil or cold soak | Stains literally everything it touches. |
| Beets | Blush pink to dusty rose to burgundy | 3 to 4 hrs (overnight = deepest) | Cold soak ONLY | Will turn brown if you boil eggs in it. |
| Hibiscus tea | Lavender to graphite to charcoal | Overnight (12 to 14 hrs) | Hot boil, then long soak | Needs real flowers, not teabags. |
Just Try It This Easter
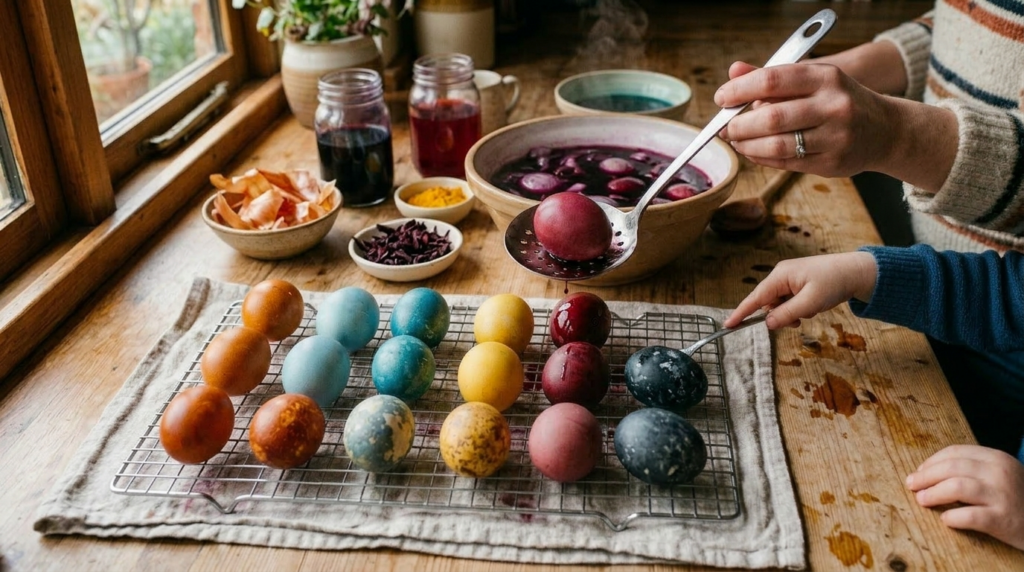
The hardest part of this whole thing is deciding which color to start with. If you’re nervous, go onion skins. You literally cannot mess it up. I’ve tried. If you want drama, go cabbage or hibiscus. If you want to impress yourself with how easy this can be, go turmeric. And if you’re a glutton for punishment who loves a good challenge, go beets. Beautiful, maddening, absolutely worth-it beets.
When those first eggs come out of the pot, still warm, that deep amber deepening as they dry while your kitchen smells like a spice market and vinegar and your kid is standing on a chair going “whoa, Mom, that one looks like a dragon egg” and your husband is wandering in asking if dinner is almost ready even though it’s clearly 10 in the morning… you’ll get it. You’ll understand why I haven’t bought a kit in six years. And honestly? I never will again.