

When I first tried homemade hot cross buns, I didn’t even know what they were. A coworker dropped a tray of them at the office the week before Easter, and I grabbed one thinking it was just some kind of spiced roll. Soft dough, warm cinnamon, little pops of sweetness from the currants, and that glossy glaze on top. I ate three. That afternoon I went home and Googled “how to make hot cross buns from scratch,” and what I found was a hundred recipes that all looked simple enough. None of them warned me about the four years of bad batches ahead.
This is my traditional hot cross buns recipe, plus everything I wish someone had told me before I started. Not just the ingredient list, but the reasons behind every choice, the mistakes that will ruin your buns, and real advice on how to get these right on your first try.
The Recipe
Yields: 12 buns Prep time: 30 minutes Rise time: about 2 hours total Bake time: 20 to 22 minutes
Ingredients
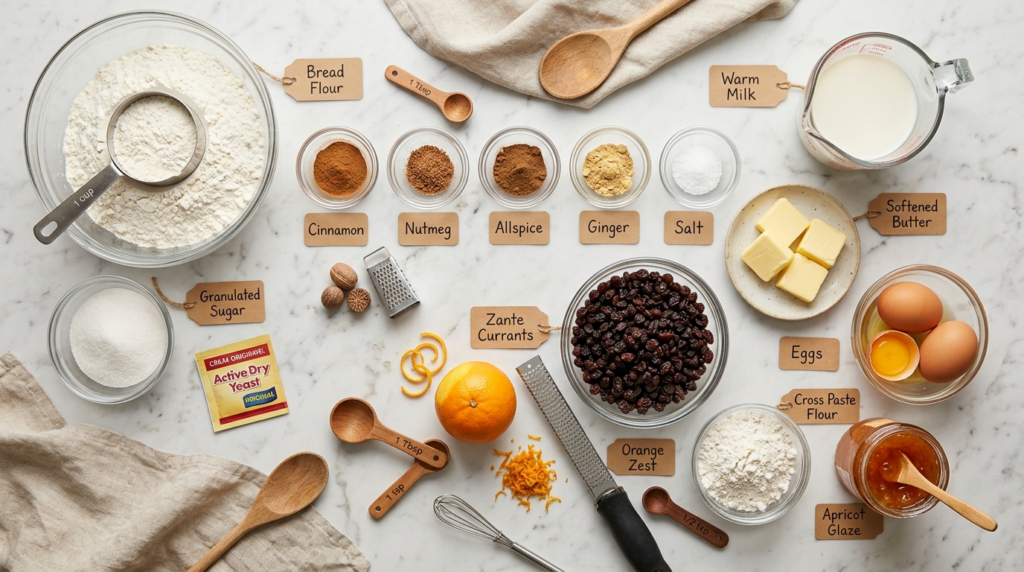
For the dough:
- 3 1/2 cups / 440 g bread flour (plus extra for dusting)
- 1/4 cup / 50 g granulated sugar
- 1 1/2 teaspoons ground cinnamon
- 1/2 teaspoon freshly grated nutmeg
- 1/4 teaspoon ground allspice
- 1/4 teaspoon ground ginger
- 3/4 teaspoon salt
- 1 packet / 2 1/4 teaspoons / 7 g active dry yeast
- 3/4 cup / 180 ml whole milk, warmed to 105°F / 40°C
- 4 tablespoons / 56 g unsalted butter, softened to room temperature
- 1 whole egg plus 1 egg yolk (save the extra white)
- 1 tablespoon finely grated orange zest
- 2/3 cup / 100 g Zante currants
For the cross paste:
- 1/3 cup / 40 g all-purpose flour
- 1/2 teaspoon granulated sugar
- 4 to 5 tablespoons / 60 to 75 ml water (or leftover egg white plus water to equal that amount)
For the glaze:
- 2 tablespoons / 40 g apricot preserves
- 1 tablespoon / 15 ml water
How to Make Hot Cross Buns Step by Step
1. Warm the milk to 105°F / 40°C. Pour it into a large bowl, sprinkle the yeast over the surface, add a pinch of sugar, and stir gently. Let it sit for about 10 minutes. If it foams up, you’re good. If nothing happens, your yeast is dead and you need a new packet.
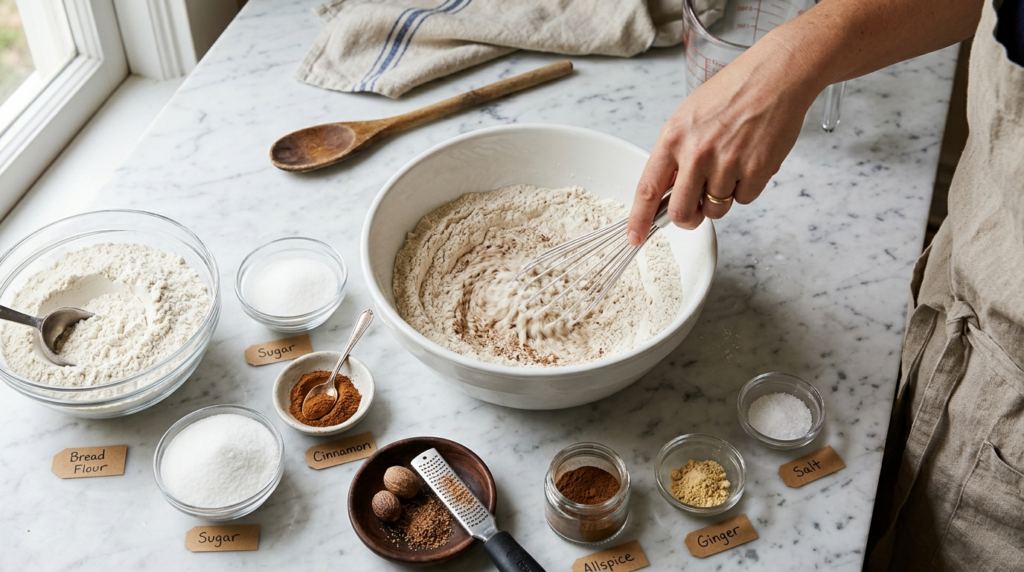
2. In a separate bowl, whisk together the bread flour, sugar, cinnamon, nutmeg, allspice, ginger, and salt.
3. Once the yeast is foamy, add the softened butter, the whole egg, the extra yolk, and the orange zest to the milk mixture. Stir until roughly combined. It won’t be smooth and that’s fine.
4. Add the flour mixture to the wet ingredients about one cup at a time, stirring with a wooden spoon until a shaggy dough forms. Turn it out onto a lightly floured surface.
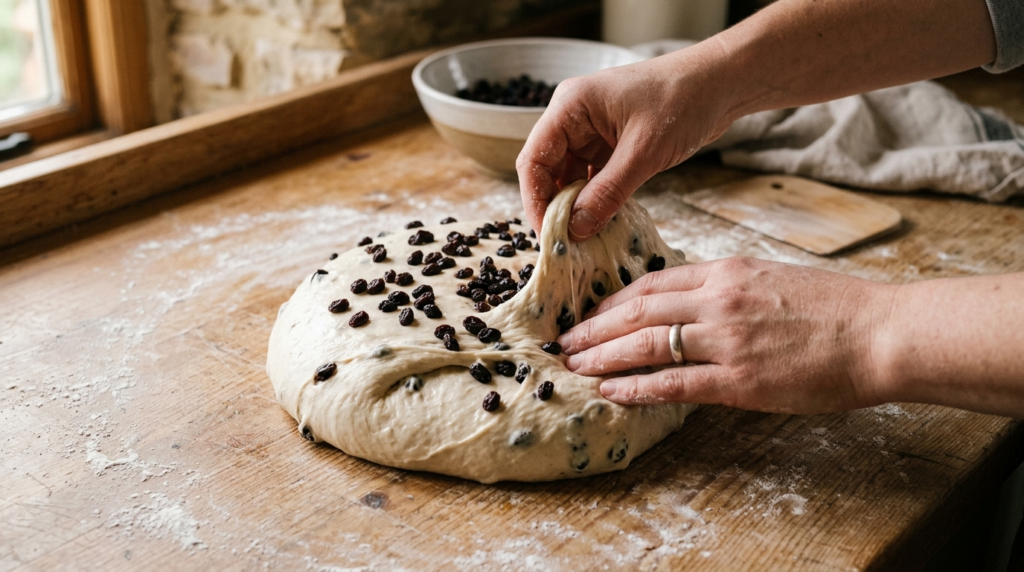
5. Knead for 10 to 12 minutes by hand. If you’re using a stand mixer with a dough hook, 7 to 8 minutes on medium speed. The dough should be smooth, elastic, and slightly tacky but not sticky. Do the windowpane test: pull off a small piece and stretch it thin. If you can see light through it without it tearing, you’re done. If it rips, keep going.
6. Flatten the dough slightly, scatter the currants over the surface, and fold and press them in gently until they’re evenly distributed. This should only take about 30 seconds.
7. Shape the dough into a ball and place it in a lightly greased bowl. Cover with a clean kitchen towel or plastic wrap. Let it rise in a warm spot for 1 to 1 1/2 hours, until roughly doubled in size. I turn my oven on to 200°F / 93°C, shut it off, and use that as my proofing spot.
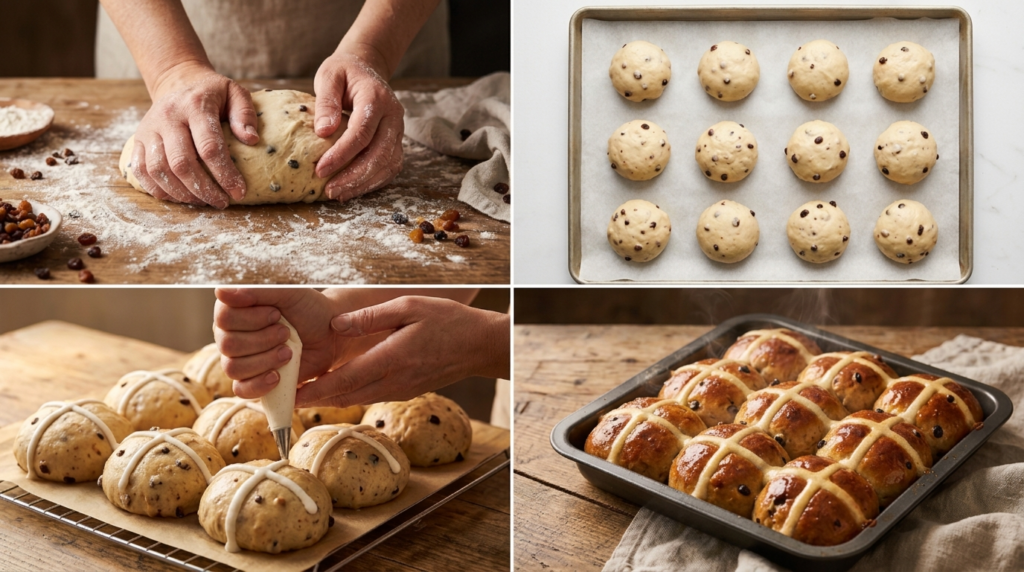
8. Punch the dough down gently. Divide it into 12 equal pieces, roughly 75 to 80 g each. I use a kitchen scale for this because eyeballing it always gives me some buns twice the size of others. Roll each piece into a smooth ball by tucking the edges underneath and rotating it against the counter with a cupped hand.
9. Place the balls on a parchment-lined baking sheet in a 3×4 grid, spacing them about half an inch / 1.5 cm apart. They should be close enough that they’ll grow together slightly during the second rise. Cover again and let rise for 30 to 45 minutes. They’re ready when you poke one gently and the dent springs back about halfway.
10. While the buns are on their second rise, preheat the oven to 375°F / 190°C. Make the cross paste by mixing the flour, sugar, and water until you get a thick, smooth paste, roughly the consistency of toothpaste. Spoon it into a zip-lock bag and snip a tiny corner off, about the width of a pencil lead.
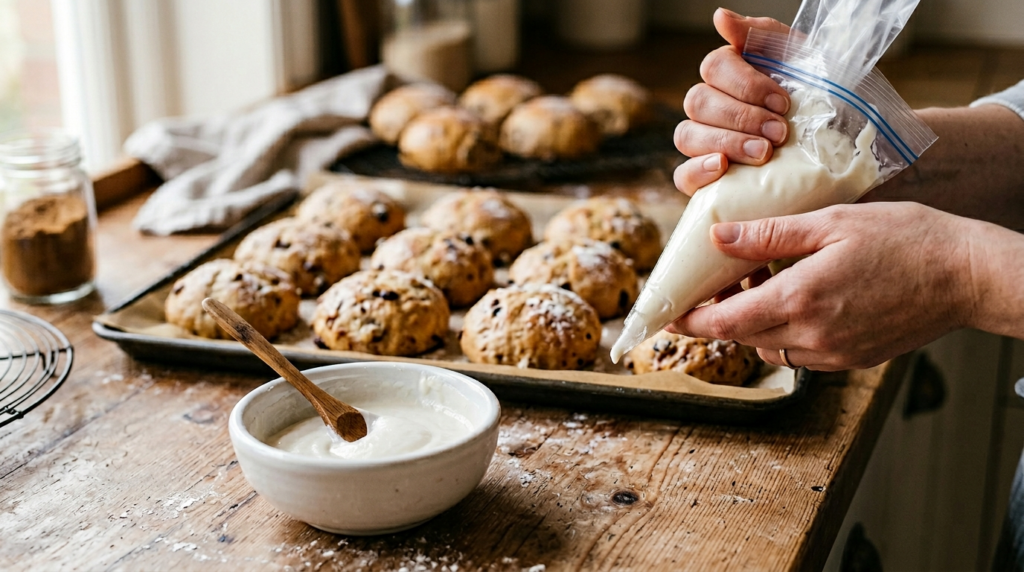
11. Pipe the crosses onto the buns. Don’t do each bun individually. Instead, pipe one long continuous line across each row, then one long line down each column. This gives you much straighter, more confident crosses.
12. Bake for 20 to 22 minutes, until the tops are golden brown and the buns sound hollow when you tap the bottom of one. Internal temperature should read about 190°F / 88°C.
13. While the buns bake, heat the apricot preserves and water together in a small saucepan over low heat. Strain through a fine mesh sieve to remove any chunks.
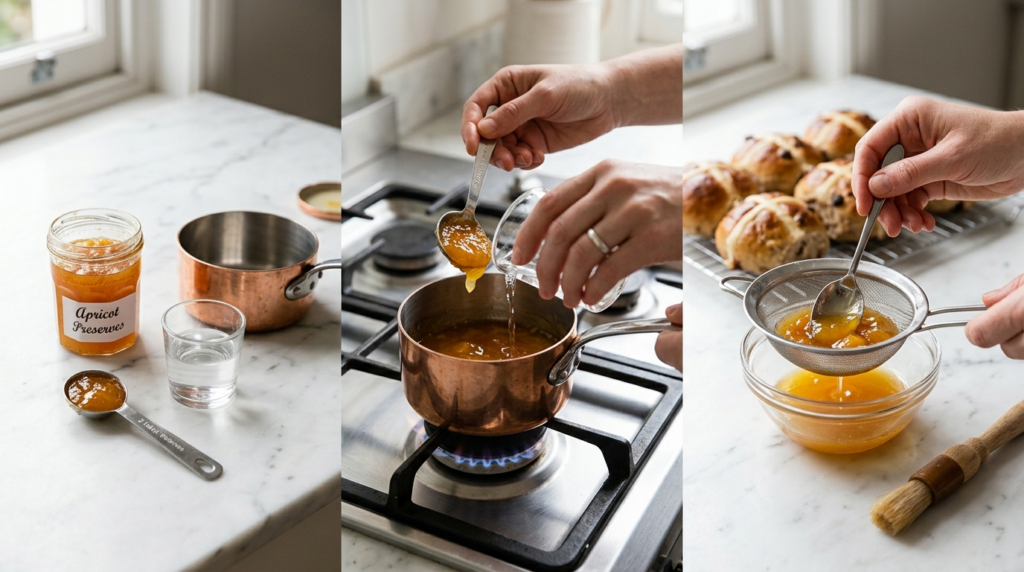
14. The second the buns come out of the oven, brush the warm apricot glaze over the tops with a pastry brush. Do this quickly while they’re still hot.
15. Let them cool on the pan for about 5 minutes, then transfer to a wire rack. Or just eat one immediately. I won’t judge.
The History of Hot Cross Buns: Why This Easter Bread Still Matters
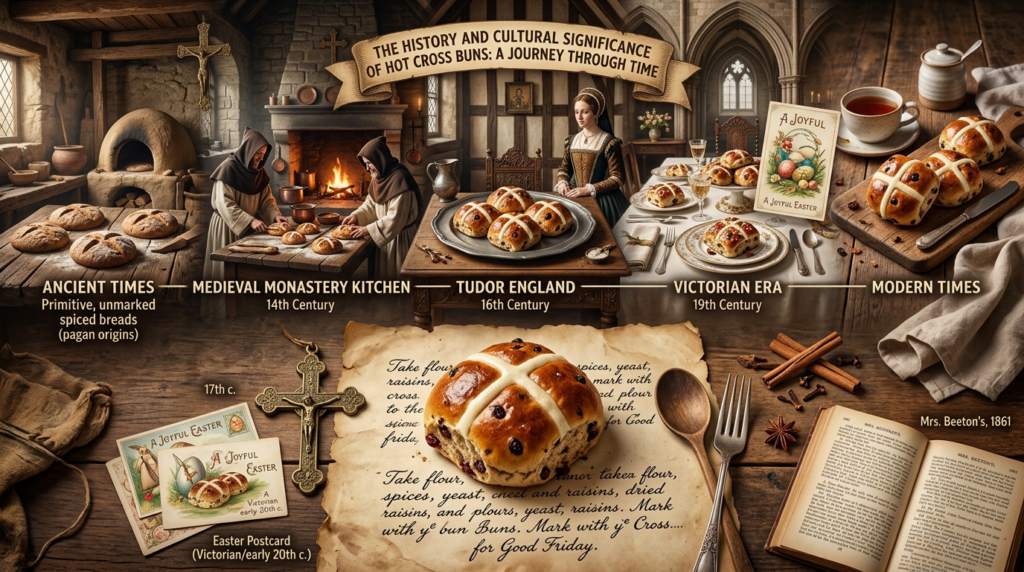
Most Americans know hot cross buns from the nursery rhyme. “One a penny, two a penny.” We sang it as kids and never connected it to an actual food. That’s a real shame, because these are one of the oldest Easter breads in the English-speaking world, with an unbroken tradition going back to at least the 1500s.
The story usually cited is that monks in medieval England baked spiced bread rolls marked with a cross and gave them to the poor on Good Friday. By the time of Elizabeth I, the English government actually passed laws limiting when these spiced buns could be sold. They were considered too significant, almost ritualistic, to be everyday food. The cross was a symbol of faith, not a design choice. The spices, cinnamon, nutmeg, allspice, were expensive imports that signaled the occasion was special.
English colonists brought the tradition to America, but it never took hold here the way it did in Britain, Australia, and New Zealand, where hot cross buns are a massive seasonal event. Walk into any supermarket in Sydney in March and you’ll find an entire aisle dedicated to them. Here in the States, they’re still relatively niche, and that means most Americans have only ever had mediocre store-bought versions. I want to change that, at least for anyone reading this.
What Makes Hot Cross Buns Special: the Ingredients
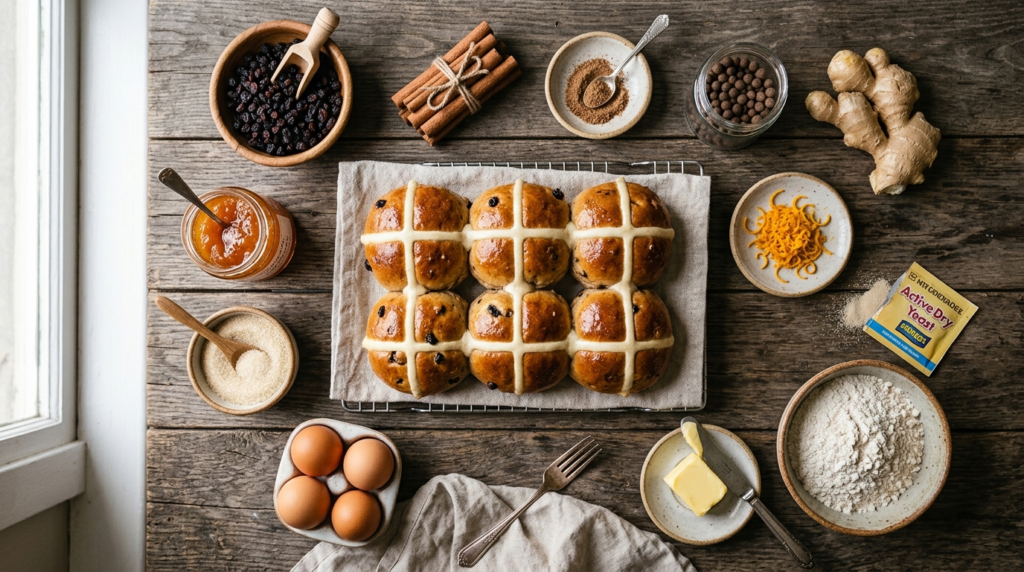
Let me walk you through every ingredient because I’ve learned the hard way that “close enough” substitutions can quietly ruin the whole batch. Knowing what each item does will make you a better baker, not just with this easy hot cross buns recipe, but with enriched doughs in general.
Bread flour. I used all-purpose flour for my first two years of baking these. The buns were always slightly crumbly. Fine to eat warm, but by the next morning they’d fall apart when you tried to slice them. Bread flour has a higher protein content, around 12 to 13 percent versus 10 to 11 percent for all-purpose. More protein means more gluten, and more gluten means a chewier, more resilient crumb that holds together even after the bun cools. If you only have all-purpose flour, add one tablespoon / about 9 g of vital wheat gluten per cup / 125 g of flour. I’ve tested this side by side multiple times and the results are nearly identical to using bread flour.
Active dry yeast, not instant. I know instant yeast is faster and more forgiving. I still prefer active dry for this recipe because it gives me a checkpoint. I bloom it in warm milk for about ten minutes, and if it foams up, I know the yeast is alive before I commit all my other ingredients. This one step has saved me from wasting an entire batch more times than I can count. If your yeast doesn’t foam, it’s dead. Throw it out. Start over. Better to lose five minutes than two hours.
Whole milk, warmed to exactly 105°F / 40°C. I cannot overemphasize how important the temperature is. Too hot, above 115°F / 46°C, and you kill the yeast. Too cold, below 95°F / 35°C, and the yeast activates so slowly your rise may never fully happen. I used to guess the temperature by feel. “Warm to the touch, like bathwater.” That approach failed me at least half a dozen times. I finally bought an instant-read thermometer for nine dollars at a grocery store and the problem vanished overnight. Milk specifically, not water, because the fat and sugars in whole milk contribute to a softer crumb, better browning, and a richer flavor.
Unsalted butter, softened. Butter does more than add fat. Because it’s a solid at room temperature, it creates tiny layered pockets in the dough structure that give the finished bun a tender pull-apart quality you simply cannot get from oil. It also adds flavor that oil doesn’t have. Unsalted, because I want to control the sodium myself. Room temperature, because if you try to knead cold butter into this dough, you’ll fight it for twenty minutes and the butter will just sit in chunks that melt out during baking, leaving greasy holes.
One whole egg plus one extra yolk. The whole egg provides structure and binding. The extra yolk, without the white, adds richness, color, and tenderness without making the dough tough the way a second whole egg would. The proteins in egg whites tighten and firm up during baking. That’s great in moderation, but too much makes the crumb dry. Save that extra white for the cross paste or brush it on top before baking for extra shine.
The spice combination: cinnamon, nutmeg, allspice, and ginger. This is where the soul of a traditional hot cross bun lives. Two things I learned the hard way. First, fresh nutmeg versus pre-ground nutmeg is not a subtle difference. It’s a dramatic one. Pre-ground nutmeg loses its volatile oils quickly and tastes flat, almost dusty. A whole nutmeg, grated on a microplane right into the dough, is aromatic and bright and warm. Whole nutmegs cost almost nothing and last for months. Second, go easy on the cloves if you’re tempted to add them. I put a quarter teaspoon of ground cloves in a batch once and it dominated everything else. Cloves are a bully spice. I no longer use them in this recipe at all.
Zante currants, not raisins. This is a hill I have personally died on multiple times in arguments with friends. Zante currants are tiny, just slightly sweet, and distribute evenly through the dough so every bite has a little burst of fruit. Regular raisins are too large, too wet, and too sweet. They create soggy pockets and overwhelm the spice. If you absolutely cannot find currants (check the baking aisle, not the produce section), chop raisins into quarters and blot them dry with paper towels. Dried cranberries or chopped dried cherries also work for a variation, but they change the character of the bun.
Orange zest. One tablespoon, finely grated on a microplane, zesting only the bright orange outer layer and not the bitter white pith underneath. This ingredient doesn’t make the bun taste like orange. What it does is add a background brightness, a subtle lift that makes the spice feel more alive. I didn’t include orange zest for my first three years of making these. The first time I added it, I finally understood what had been missing.
How to Pipe the Cross on Hot Cross Buns

The paste for the crosses is just flour, a pinch of sugar, and water, mixed to a consistency like thick toothpaste. Some recipes use a shortcrust pastry strip or a powdered sugar icing piped on after baking. I’ve tried all three. The flour paste, piped on before baking, is traditional and produces the best result. The cross bakes into the bun, turns pale golden, and has a slight crispness. Icing melts and smears. Pastry strips look pretty but add a different texture that competes with the soft dough.
Pipe the paste using a plastic bag with a small corner cut off. The opening should be about the width of a pencil. Pipe in confident, single strokes. One line across the whole row of buns, then one line down each column. Don’t try to do individual crosses on individual buns. You’ll get wobbly, uneven lines. I speak from embarrassing experience.
Hot Cross Buns Mistakes: the Five Biggest and How to Avoid Them

Not kneading long enough. Enriched doughs, meaning doughs loaded with butter, sugar, and eggs, take significantly longer to develop gluten than lean bread doughs. Plan for ten to twelve minutes by hand or seven to eight minutes in a stand mixer on medium speed. You’re done when the dough passes the windowpane test. Tear off a small piece, stretch it gently between your fingers, and if it stretches thin enough to see light through without ripping, your gluten is ready. If it tears, keep kneading. I used to quit too early because my arms were tired. The buns came out dense and heavy every single time.
Adding the currants too early. Fold the fruit in after the dough is fully kneaded. If you add currants at the start, they get crushed during kneading, release moisture, make the dough sticky, and physically interfere with gluten development. Knead first, then gently fold in the fruit until it’s evenly distributed. Thirty seconds, gentle hands.
Over-proofing the second rise. The shaped buns need a second rise on the baking sheet, about thirty to forty-five minutes. Here’s the test. Poke a bun gently with your fingertip. If the dent slowly springs back about halfway, they’re ready. If it springs back instantly, they need more time. If the dent stays and doesn’t spring back at all, you’ve over-proofed. Over-proofed buns collapse in the oven and come out flat and dense. I ruined an entire batch one Thanksgiving morning because I got distracted making gravy and forgot about the buns on the counter. By the time I remembered, they looked like deflated balloons. There was no saving them.
Wrong oven temperature. These bake at 375°F / 190°C. Not 350°F / 175°C, which is too low and dries them out before they brown. Not 400°F / 205°C, which browns the outside too fast and leaves the center doughy. If you have any doubt about your oven’s accuracy, buy an oven thermometer. They cost about five dollars and I consider one essential equipment. My first apartment oven ran twenty degrees hot, and I didn’t know it for months. Every recipe I made was slightly burned on the outside and underdone in the middle, and I thought I was a terrible baker.
Skipping the glaze. When the buns come out of the oven, you have about sixty seconds to brush them with a warm glaze before they start to cool and the surface sets. I heat two tablespoons / 40 g of apricot preserves with one tablespoon / 15 ml of water in a small saucepan, strain out any chunks, and brush the warm mixture over the hot buns with a pastry brush. This gives them that gorgeous, glossy, slightly tacky finish that makes people reach for one immediately. Some bakers use a simple syrup of equal parts sugar and water. That works too, but apricot adds a whisper of flavor and a deeper shine. Do not skip this step. It takes one minute and makes a visible difference.
Hot Cross Buns Substitutions That Actually Work
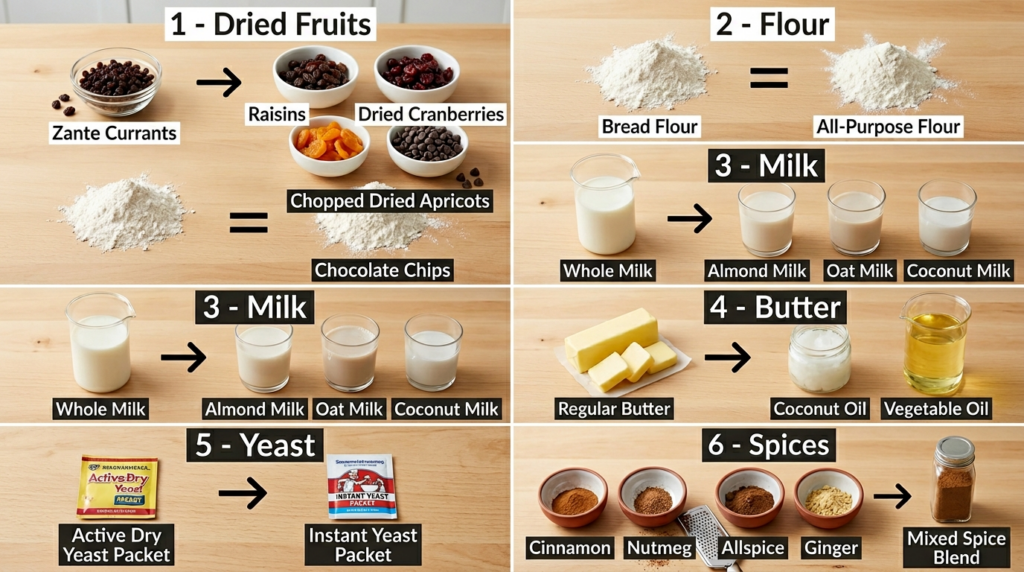
For dairy-free bakers, oat milk is the best replacement for whole milk. It has natural sugars and enough body to mimic the richness. For butter, a high-quality plant-based butter works well. Look for one with high fat content, at least 70 percent. I’ve tested this and the results are genuinely good, not just acceptable.
For egg-free baking, this gets harder. A flax egg (one tablespoon / 7 g ground flaxseed mixed with three tablespoons / 45 ml water, rested five minutes) works as a binder, but the crumb is noticeably different. Denser, slightly gummy. If you need egg-free for allergy reasons, it’s a workable compromise. But I want to be honest with you. It won’t be the same.
For gluten-free hot cross buns, I have tried this six times with three different flour blends and I have not produced a result I’d serve to someone I respect. The texture just isn’t there yet. If anyone has cracked a truly excellent gluten-free version, I would genuinely love to hear about it in the comments.
For the fruit, swap currants for dried cherries, dried blueberries, chopped dried apricots, or even chocolate chips if you’re making these with kids. My neighbor’s ten-year-old son specifically requests chocolate chip hot cross buns every year and I make him a separate batch. They’re not traditional, but they make him happy and that’s enough for me.
Hot Cross Buns Nutrition and How to Store Them

Each bun (this recipe makes twelve) comes in at roughly 230 to 260 calories, depending on exact size. About 38 g of carbohydrates, 7 g of fat, 5 g of protein, and 11 to 13 g of sugar. These are not diet food and I’m not going to pretend otherwise. They’re enriched bread made with butter and eggs and sugar, and they’re meant to be enjoyed.
Homemade hot cross buns are at their absolute peak within two hours of coming out of the oven. On day two, split them in half and toast them. A toasted day-old hot cross bun with butter is one of the great simple pleasures in food. They keep in an airtight container at room temperature for up to three days. After that, the texture goes downhill.
For longer storage, freeze them. I wrap each bun individually in plastic wrap, place them in a freezer bag, press out the air, and freeze. They hold up well for about two months. To reheat, thaw at room temperature for an hour, then warm in a 300°F / 150°C oven for five to seven minutes. Do not use the microwave. Microwaved bread turns rubbery and sad within about thirty seconds of cooling. I’ve made this mistake enough times to feel strongly about it.
Why I Keep Making These Homemade Hot Cross Buns
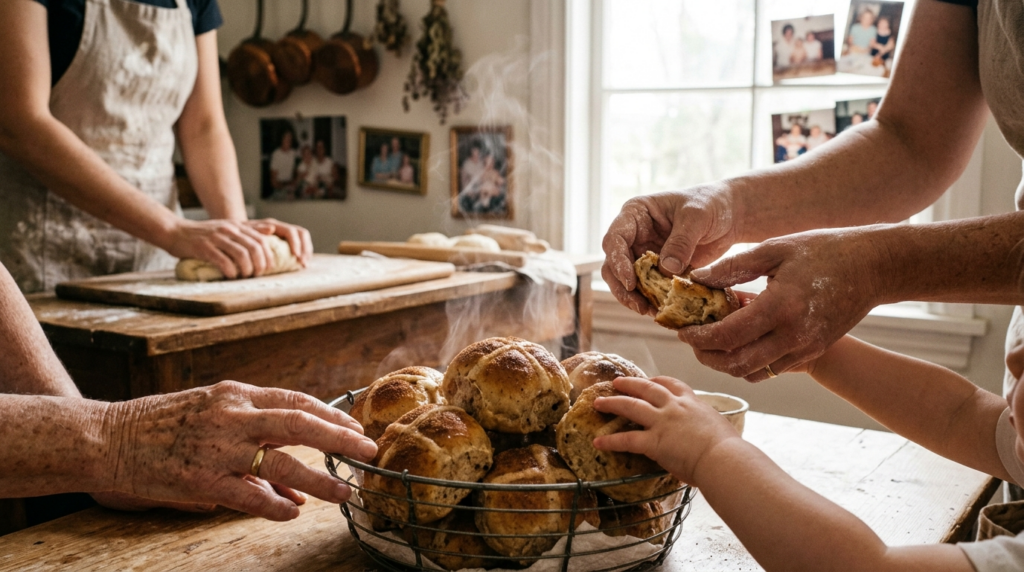
I make hot cross buns at least four or five times a year now, and not just for Easter. I make them when a friend has a baby. I make them when someone in my life is going through a hard time and I don’t know what to say but I want to show up with something. I make them on quiet Sunday mornings when I have nowhere to be and just want my kitchen to smell like cinnamon and warm bread.
Every batch is slightly different. Some are a little taller. Some have crosses that wandered a bit. One time I accidentally doubled the ginger and it turned out to be my favorite batch ever. I’ve never been able to replicate it exactly. That’s the nature of bread baking. It’s never perfectly consistent, and honestly, that’s part of why I love it.
If you’re making this hot cross buns recipe for the first time, promise me you won’t judge it by your first attempt. My first batch looked like it had been in a car accident. My second batch was better. By the tenth batch, I had something I was genuinely proud of. Bread rewards persistence more than talent, and these buns are worth the persistence.
Make them. Mess them up. Make them again. And when they finally come out right, soft, fragrant, glossy, with neat little crosses and currants in every bite, you’ll know exactly why people have been baking these for five hundred years.